Your text (SMS) Messages on iPhone and iPad are important. However, unlike Contacts, Calendars, Notes, Reminders, Photos and Videos that can be uploaded to iCloud and automatically up to date on all your devices, the text messages you sent and received with your SIM card on iPhone or iPad cannot be synced to other devices. To keep these text messages as well as other important data on iPhone/iPad safe from unexpected data loss, it would be a wise idea to backup your device with iCloud regularly.
After successfully backed up your device with iCloud, your text messages on iPhone/iPad are quite safe now. But how to access these messages in iCloud when you lose them from your iPhone or iPad? Of course you can choose to restore your device to get back your disappeared text messages, but you’ll need to erase all current content and settings on your iPhone before restore.
Want to access and view text messages in iCloud backup without restoring the entire device? Then you’ll need to download a third-party app to view your iCloud backup files. There are varieties of iCloud backup extractors you can download from the Internet. And here in this article, we’ll show you the instructions to access and view iPhone text messages in iCloud backup using iMobie AnyTrans, a comprehensive iOS data manager that offers iCloud backup data extracting feature.
How to View Text Messages in iCloud Backup with AnyTrans
Step 1. Download and install AnyTrans free trial on your Mac or Windows computer. Launch the program.
Step 2. Choose iCloud in the homepage and sign in with your Apple ID and password.
Step 3. Download your iPhone backup.
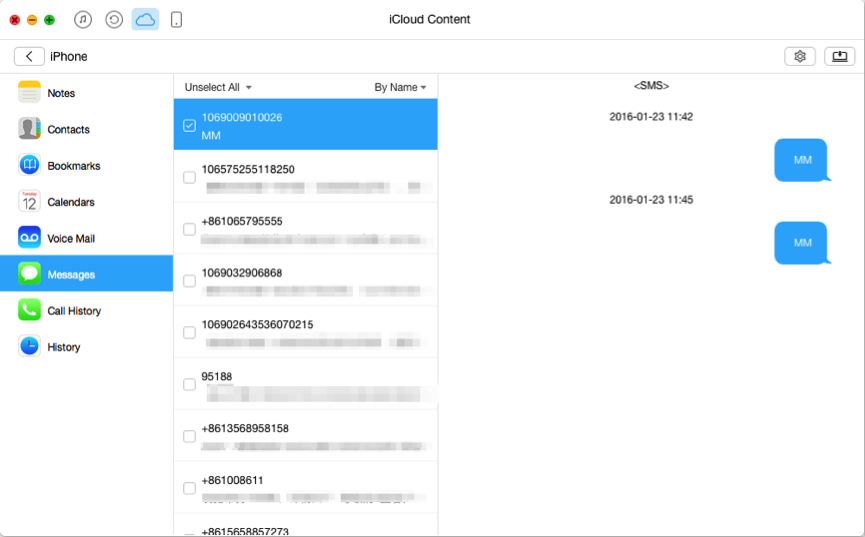
Step 4. Click Messages from the left side bar and then you can view your text messages in iCloud backup. If you need, you can also extract the text messages from iCloud backup to your computer.

Except backing up with iCloud over Wi-Fi, you can also backup your iPhone or iPad with iTunes from a Mac or PC to keep your text messages and message attachments safe. Here is an easy guide for you: How to Backup iPhone with iTunes >