“Wondering how to create video guide to tell people the strategy of this game I am playing on my iPhone 7. I don’t want to use some camera to shoot my iPhone screen, is there any way to record the screen of my iPhone 7 just like taking screenshot?”
There are lots of apps you can use to record the screen of your iPhone. And they can be divided into two categories: apps running on your iPhone, and apps running on computer. To make you know how these apps work, in this post we will show you how to use one of computer-based app – QuickTime to record iPhone screen.
Related Reading: iOS 11 brings a new feature on Control center to quickly record screen of your iPhone 7, read iOS 11 built-in Screen Recording feature and ready for the coming iOS 11 update.
How to Record iPhone 7 Screen with QuickTime
QuickTime is one of Mac built-in apps. And if your Mac is running Yosemite or newer Mac OS, you can follow this tutorial to easily record the screen of your iPhone, iPad and iPod touch.
Step 1. Run QuickTime on your Mac computer and connect your iPhone 7 to computer using data cable.
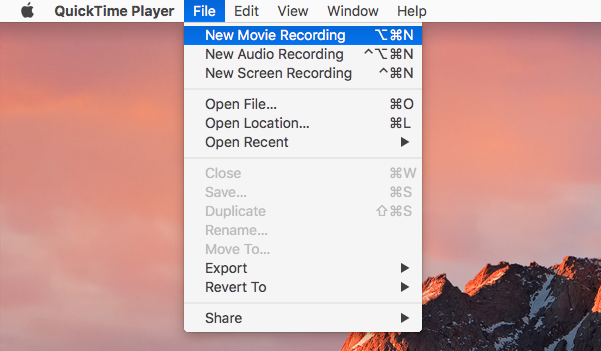
Step 2. On menu bar, click File > New Movie Recording. And then you’ll get a new movie recording window.

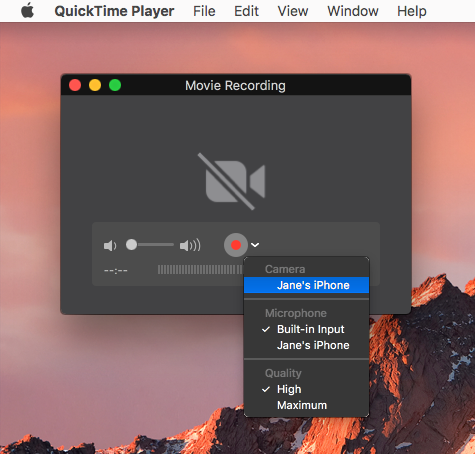
Step 3. On the popup window, the right side of the red record button, click the arrow to select your iPhone 7. After you choose iPhone 7, your iPhone screen will display on your computer.

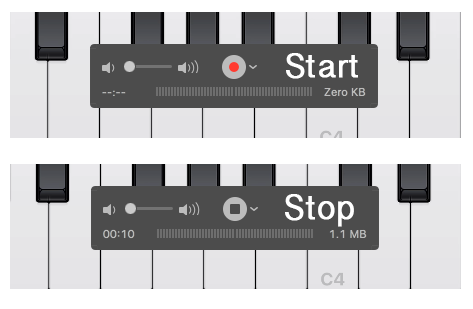
Step 4. Click the red record button to start your recording. During the process of recording, the button color will be turn to grey. You can click the button again to stop recording anytime.

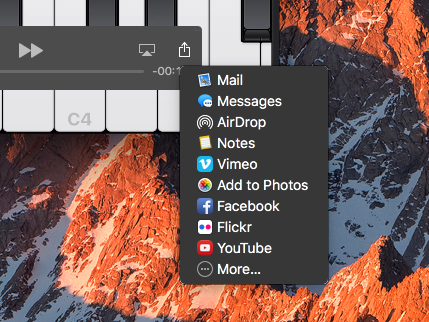
Step 5. After recording, the window will auto play the videos. And you can share this video via Email, Youtube or other tools by clicking the Share icon.
