As we know, Apple always values security and privacy. And it provides a varity of ways to secure user’s Apple ID and protect user’s privacy, like two-factor authentication and Apple ID verification code. This two-factor authentication ensures that you are the only person who can access your iCloud account, even though someone knows your password. If you are stuck on two factor authentication problem, and don’t know how to turn off two factor authentication for Apple ID, please refer to the detailed instructions to make it.
How to Turn off Two Factor Authentication for Apple ID?
To turn off two-factor authentication for Apple ID, please refer the steps on your computer and devices as below.
Step 1: Visit iCloud.com and log in with your Apple ID and password. And then it will notify you to input the verification code.
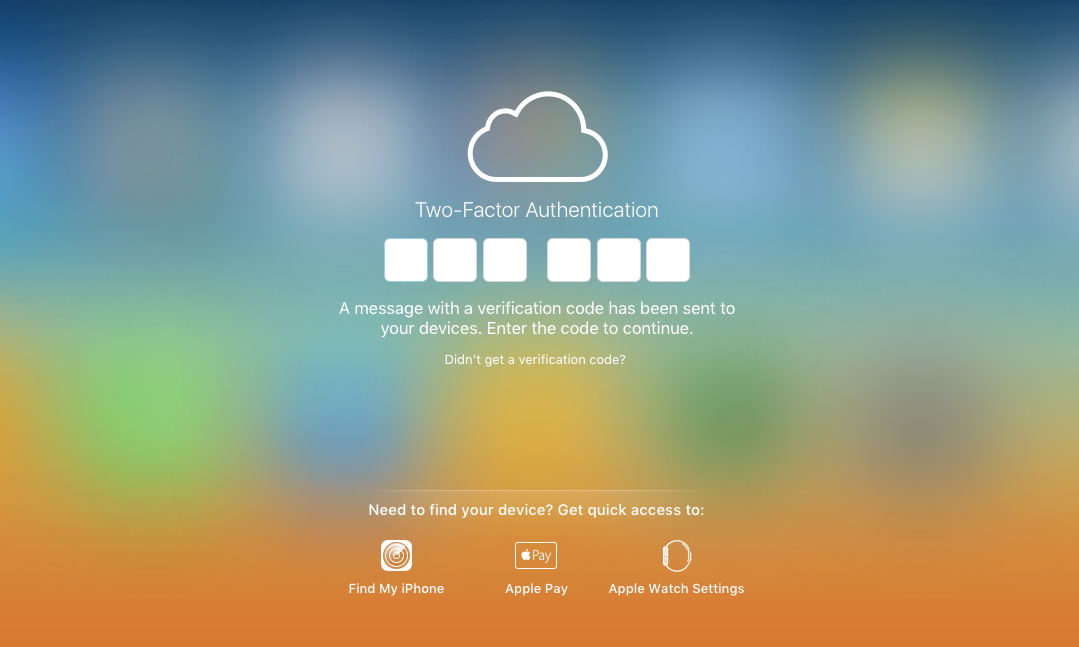
How to Turn Off Two Factor Authentication for Apple ID – Step 1
Step 2: Then, a window also pops up on iDevice (for me, it is my iPhone), says “Apple ID Sign In Requested”, please click “Allow” option. And then your iPhone will show a Apple ID Verification Code, and you need to input it in iCloud.com like the last screenshot shows. And when it asks “Trust this browser”, please click “Trust” option.
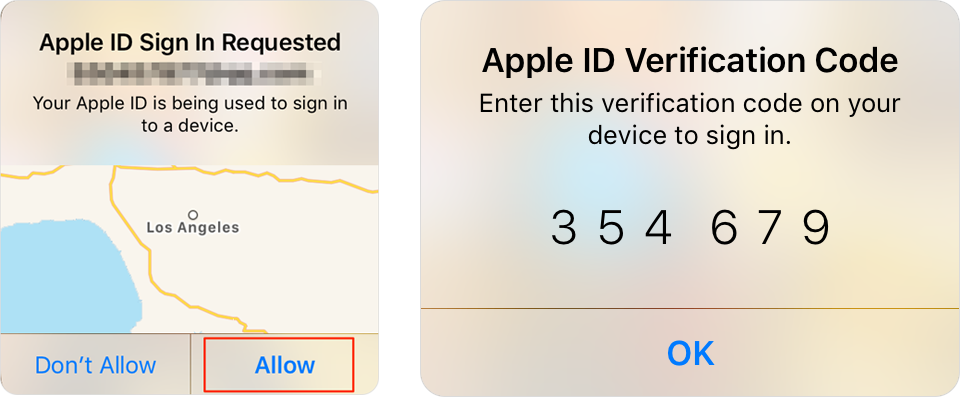
How to Turn Off Two Factor Authentication for Apple ID – Step 2
Step 3: Once signing in iCloud account successfully, please select Settings option on homepage. Or you also can click the name of your Apple ID and then click iCloud Settings option.
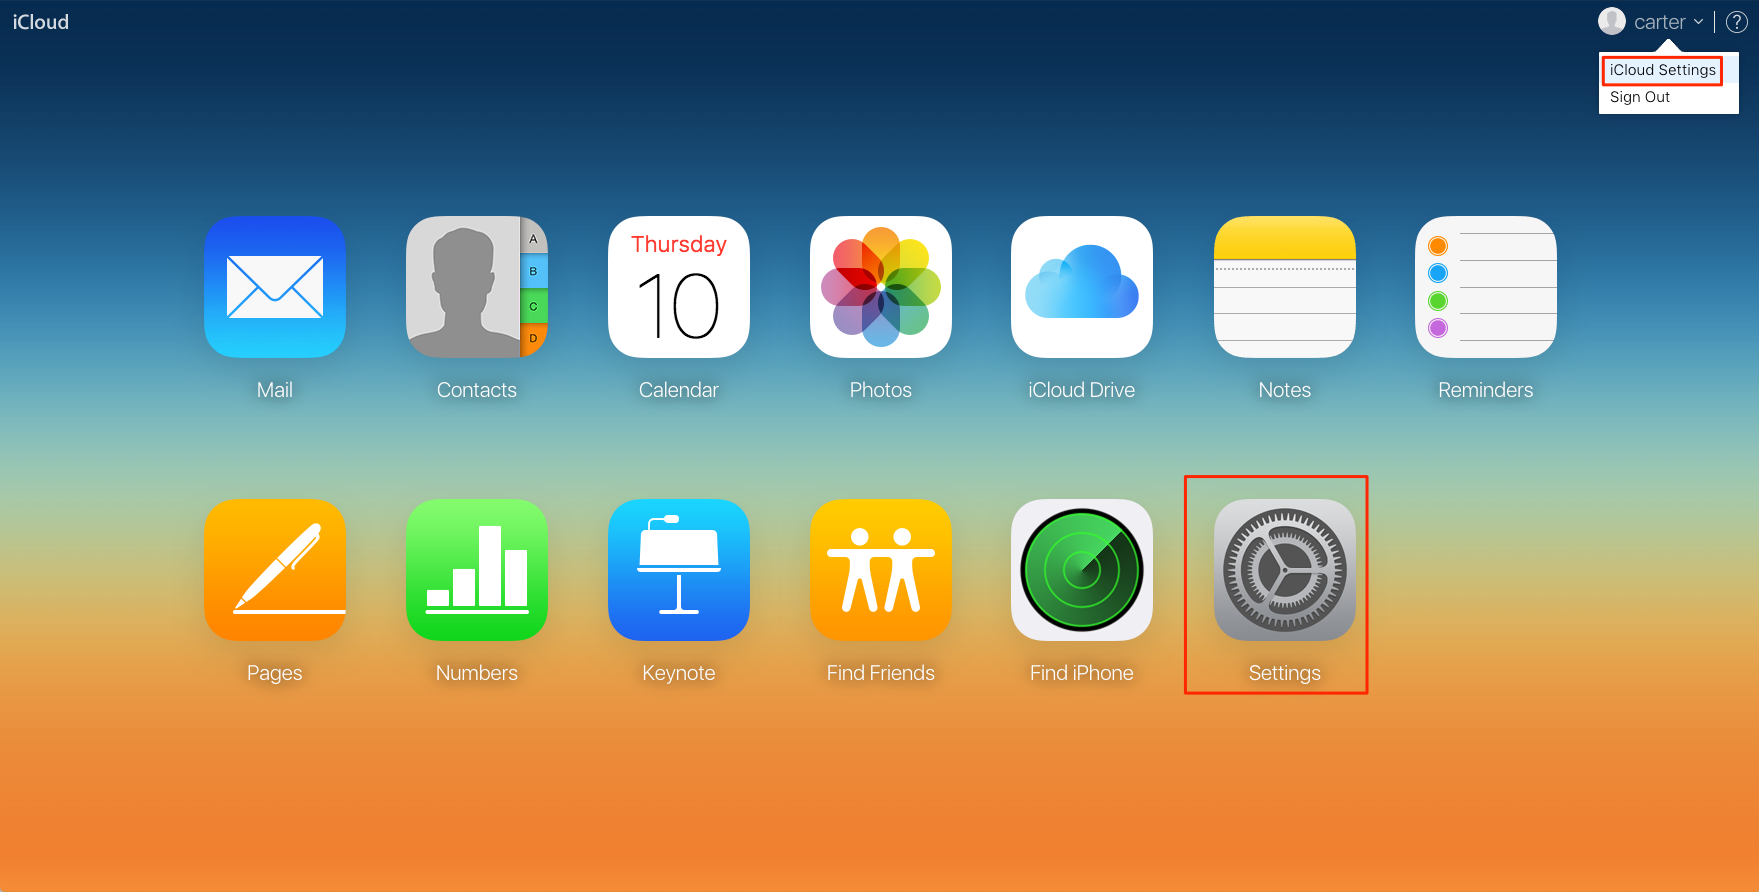
How to Turn Off Two Factor Authentication for Apple ID – Step 3
Step 4: Click “Manage” Apple ID option.

How to Turn Off Two Factor Authentication for Apple ID – Step 4
Step 5: You will be directed to another site – appleid.apple.com, and input your password to log in and verify it with Apple ID verification code. Then you will enter the manage page. Click “Edit” option in Security column.

How to Turn Off Two Factor Authentication for Apple ID – Step 5
Step 6: Click “Turn Off Two-Factor Authentication” option, and then confirm it.
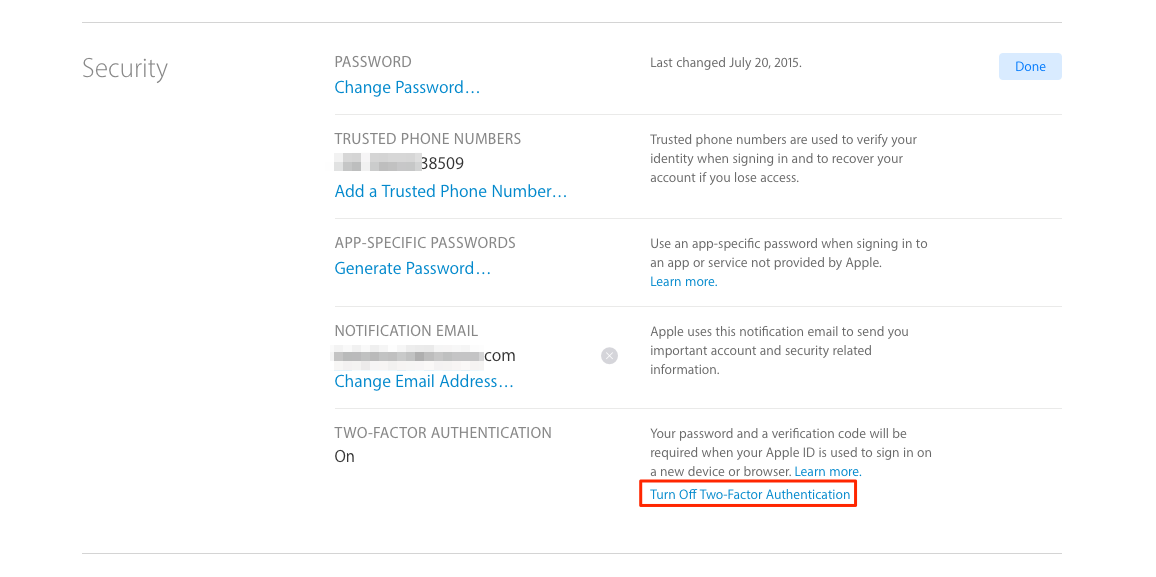
How to Turn Off Two Factor Authentication for Apple ID – Step 6
Step 7: After that, you need to select your security questions and answer them, and click “Continue” after confirming your birthday and rescue email. After all of these steps, you have turned off two factor authentication for Apple ID successfully.
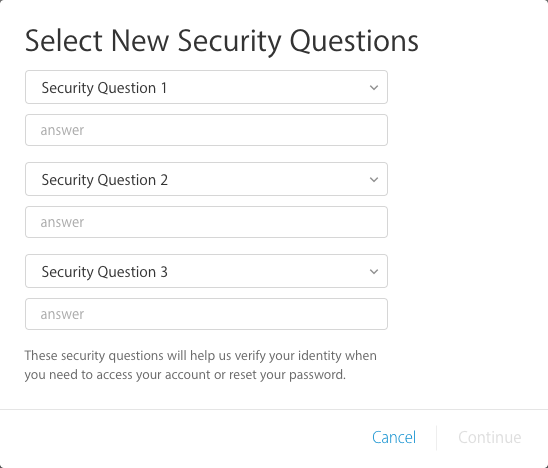
How to Turn Off Two Factor Authentication for Apple ID – Step 7