iCloud not only allows us to sync photos and videos across all our devices, but also makes it easy for us to share our albums with friends without installing additional apps. By enabling iCloud Photo Sharing feature on your iPhone or iPad, you can create albums to share your pictures or videos with multiple friends or family. Besides, people who subscribed your shared albums can view, like, and download your pictures or upload their own photos. Want to share a load of party photos taken on iPhone/iPad with your friends? Follow this quick guide to create shared photo albums on iPhone/iPad.
How to Create Shared Photo Albums on iPhone iPad
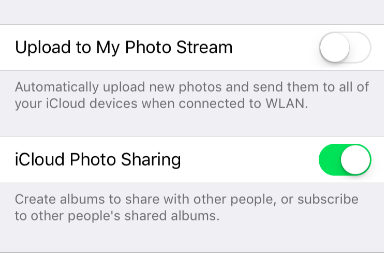
Before we start, make sure that you have turned on iCloud Photo Sharing in Settings > [your name] > iCloud > Photos in iOS 10.3 or later. If you are using iOS 10.2 or earlier, go to Settings > iCloud > Photos to check it.

Then follow these steps to create iCloud shared photo albums:
- Open Photos app and tap Share at the bottom of the screen.
- Tap the “+” button at the upper left corner.
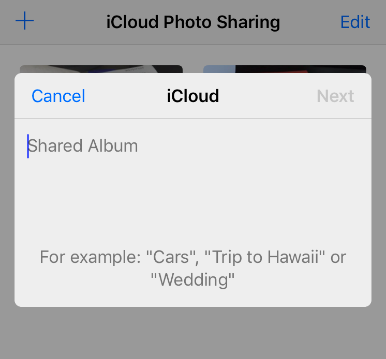
- Enter a name for your album and tap Next.

How to Create Shared Photo Albums on iPhone - Enter email addresses to invite your friend or add contacts from your contact list, then tap Create.
- Enter the newly created shared album and then you can tap the Add button to add the photos and video you want to share. Notably, Apple allows users to add 5000 photos at most to a shared album.
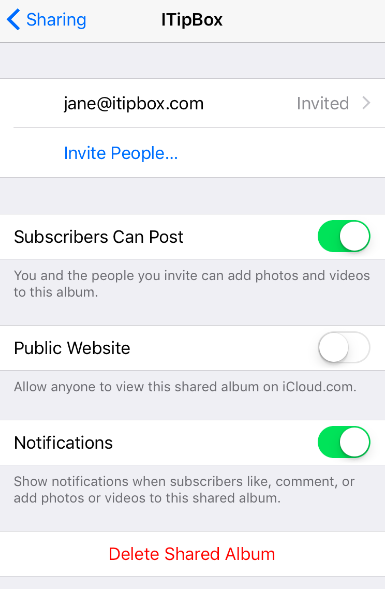
- Tap People tab at the bottom of the screen and then you can turn on Subscribers Can Post to allow the people you invite to add photos or videos to this album. In addition, you can turn on Public Website to create a link of your shared album.

iPhone Shared Album Settings Any other problem regarding iCloud Photo Sharing? Inform us via comment.